Step 2: Adding more VMs to your environment
AIX support in Skytap walk-through
To complete this section, you must first finish Step 1: Creating your first AIX environment.
Now that your first environment is created, add a second Power A CPU architecture that supports IBM i, AIX, and Linux (on Power) in Skytap. VM by making a copy of the VM that’s already in the environment, and then add a third, x86 The most common CPU architecture. x86 CPUs support Windows and Linux VMs in Skytap. VM.
Make a copy of the AIX VM
To make a copy of the VM
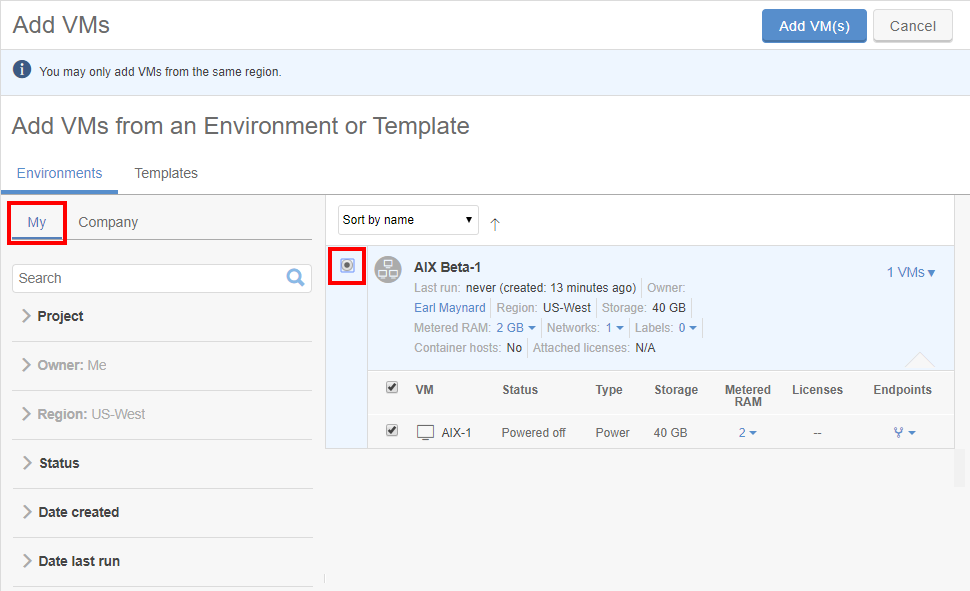
- In the Environment Details page, click Add VMs. The Environments tab of the Add VMs dialog displays.
-
Click the My tab, and then select AIX-Beta-1 (the environment you just created). Details for the VM display.
- Click
 (Add VMs). A copy of AIX-1 is added to the environment.
 -
In the VM tile of the new VM, click
 (Edit VM name). The Rename VM dialog displays.
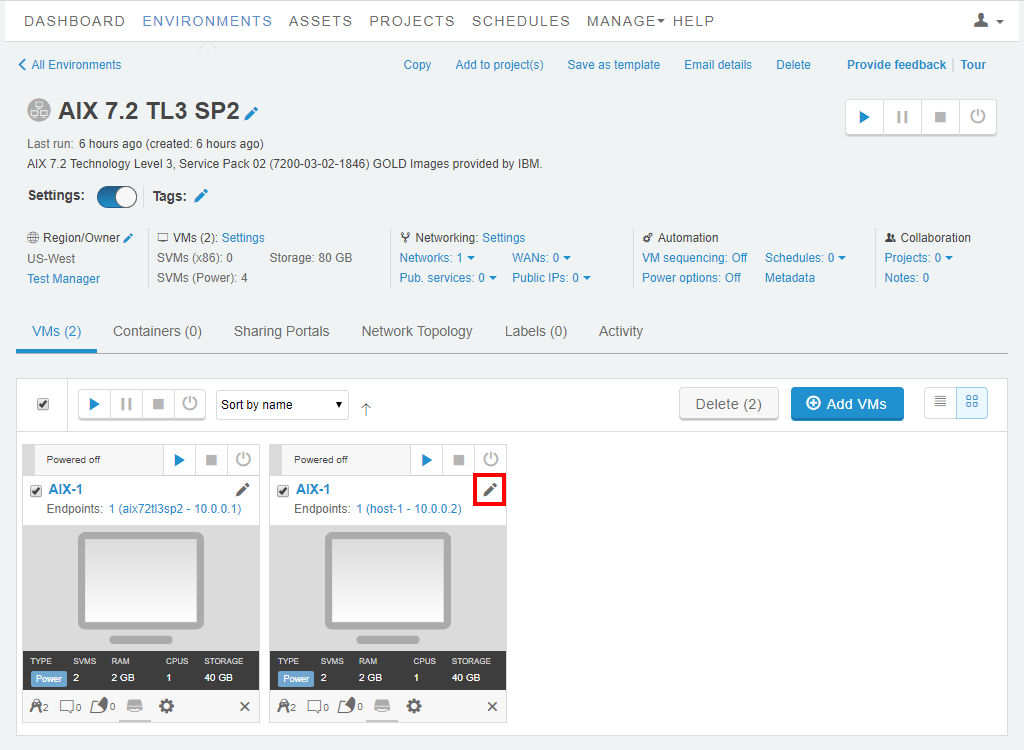
- In the VM name field, type AIX-2.
- Click Save. The name of the second Power VM changes in the Environment Details page.
Change the VM hardware settings
To change the CPU for the AIX-2 VM
-
Navigate to the VM Settings > Hardware page.
- Navigate to the environment that contains the VM you want to edit.
-
Click
 (Settings).
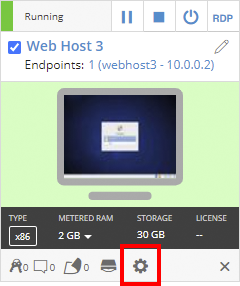
If the Settings button isn’t visible, you don’t have permission to edit the VM settings. Work with your instructor or Skytap administrator to edit these settings.
- The Hardware tab of the VM Settings page displays.
- Click the CPUs dropdown menu and select 1.
- Click Save.
- Click
 (Back to Environment).
Add a Linux VM
To add an x86-based Linux VM
- In the Environment Details page, click
 (Add VMs). The Environments tab of the Add VMs dialog displays.
 -
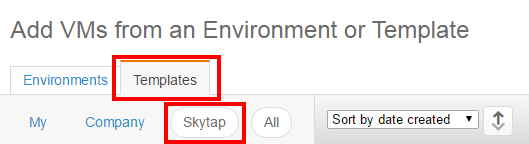
Click the Templates tab, and then select Skytap.
-
In the Search box, type Ubuntu 16. A list of Ubuntu 16 templates displays.
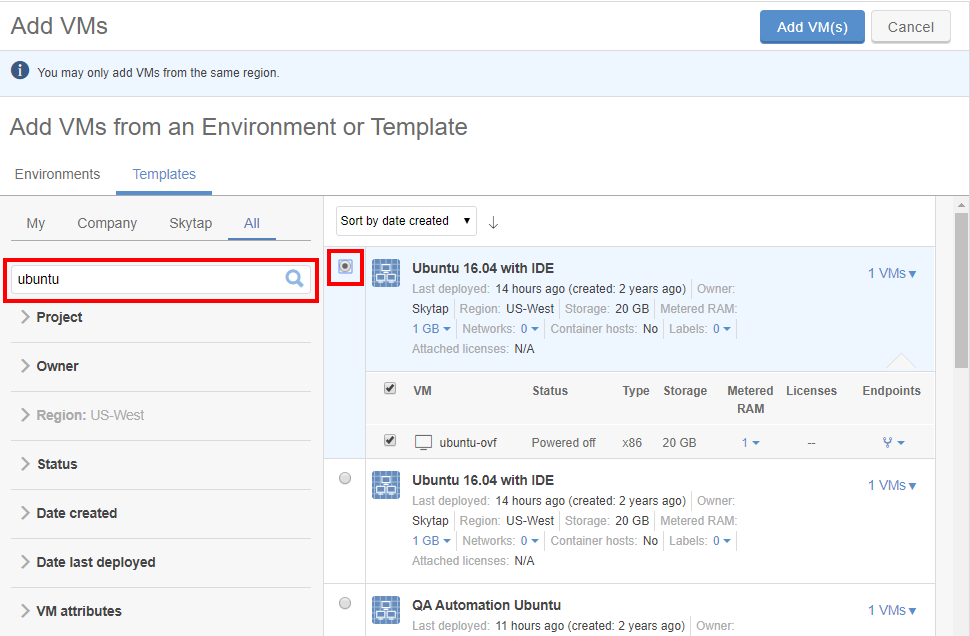
- Select the Ubuntu 16.04 LTS Server - 64 bit.
- Click (Add VMs). Ubuntu 16.04 LTS Server - 64 bit is added to the environment
Rename the Linux VM
To change the name of the Linux VM
-
In the VM tile of the new VM, click
(Edit VM name). The Rename VM dialog displays.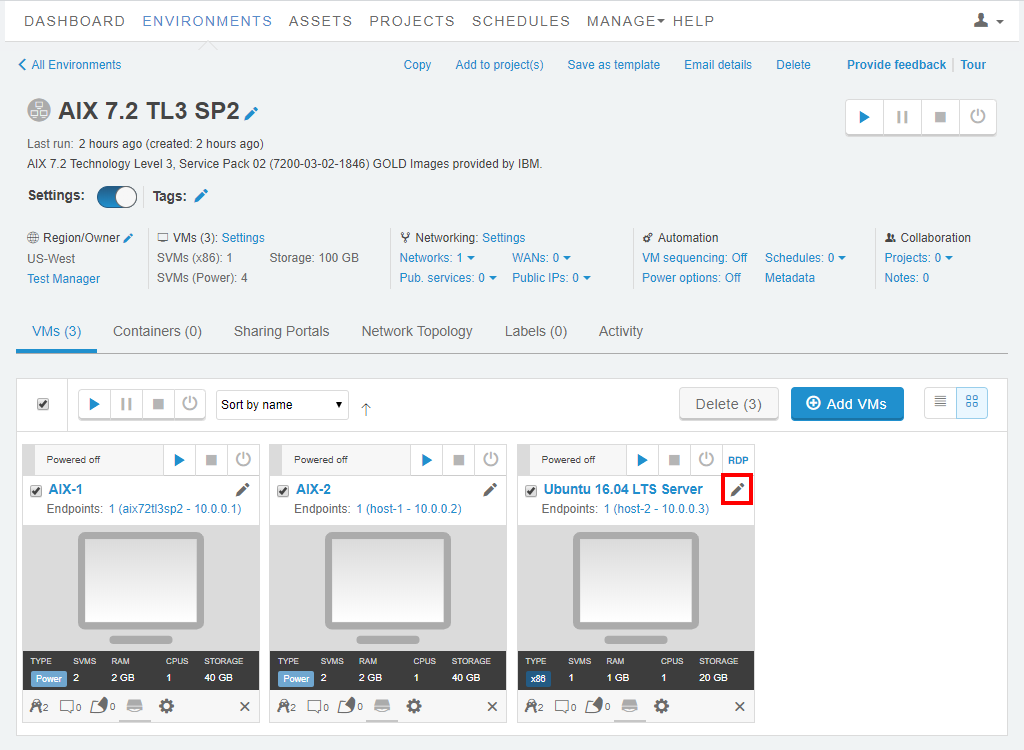
- In the VM name field, type Linux-1.
- Click Save. The name of the VM changes in the Environment Details page.
Next: Continue to Step 3: Accessing the environment.