Adding a Kyndryl Cloud Uplift on Azure subscription to your Microsoft Azure account
Microsoft Azure customers can add a Kyndryl Cloud Uplift on Azure to their account to migrate IBM Power workloads to the cloud without needing to rewrite or re-platform.
Contents
Before you begin
To add a Kyndryl Cloud Uplift on Azure subscription to your Microsoft Azure account, you must have permission to purchase software and services from Microsoft Azure Marketplace. For more details, see Azure Marketplace purchasing.
Creating a Kyndryl Cloud Uplift on Azure account
-
From the Azure services section of the Microsoft Azure portal, click Create a resource.

From the New page, search for Kyndryl Cloud Uplift.
-
In the Kyndryl Cloud Uplift on Azure badge, click Set up + subscribe to choose the region where you want to create your Kyndryl Cloud Uplift on Azure subscription.
The Subscribe to Kyndryl Cloud Uplift on Azure page displays.
-
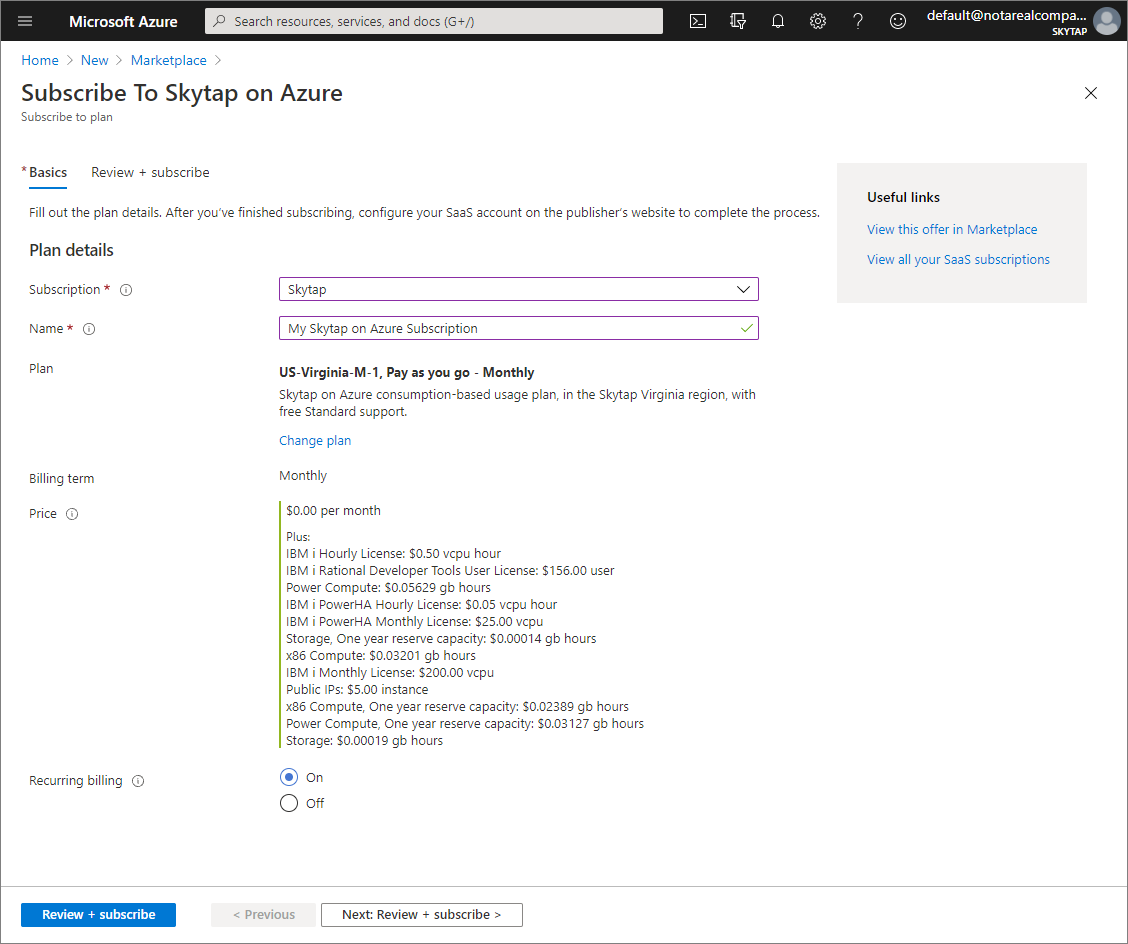
Complete the Plan details:
- Subscription – Choose the Microsoft Azure account that you want your Kyndryl Cloud Uplift on Azure subscription billed to.
- Name – Type a Name for your subscription.
-
Recurring billing – Set to On.
If you disable Recurring billing, your Kyndryl Cloud Uplift on Azure subscription–including all of your Kyndryl Cloud Uplift on Azure environments, templates, and assets—is automatically and permanently deleted at the end of the billing period. This is unrecoverable.
-
Click
 . The Subscribe to Kyndryl Cloud Uplift on Azure page displays.
If you plan to subscribe to multiple regions, you can simplify your account management by including the name of the region in the subscription name. For example: MyAccount-SG
After you review the Terms of use, click
 . The Subscription progress page displays.
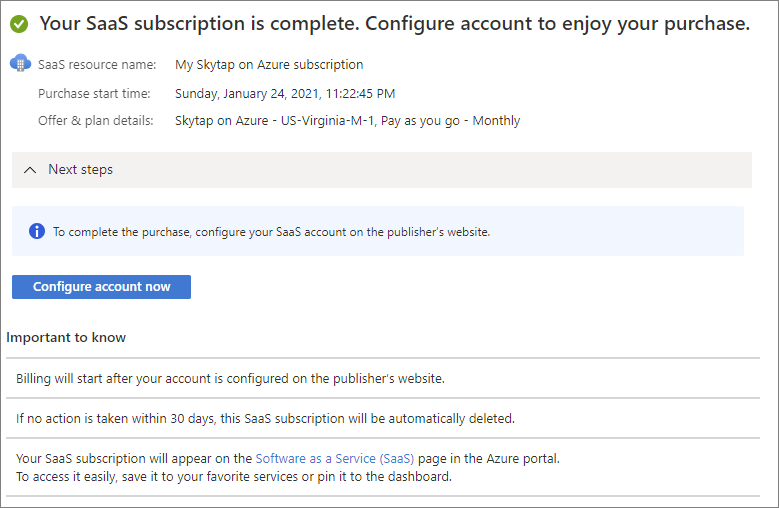
-
After the subscription process completes, click
 . The Configure a Kyndryl Cloud Uplift on Azure account page displays.
There can be a delay before you can configure your account while Microsoft Azure adds the service.
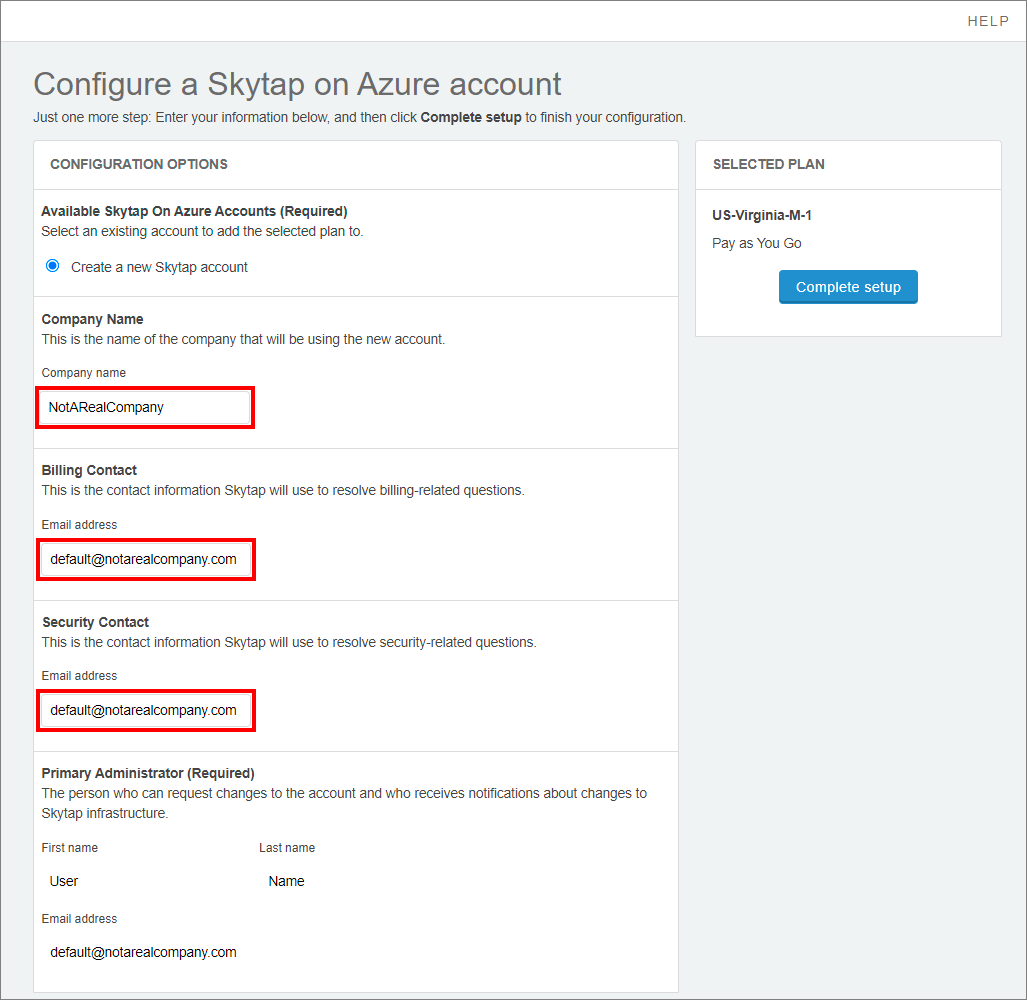
If you have an existing Kyndryl Cloud Uplift on Azure account, you can add this new subscription to it or you can Create a new Kyndryl Cloud Uplift account.
-
Provide a Company Name. Optionally, you can provide separate Billing contact and Security contact email addresses.
By default, Kyndryl Cloud Uplift on Azure uses your Microsoft Azure email address for Billing contact and Security contact.
-
Click
 . When the setup process completes, the Kyndryl Cloud Uplift on Azure Dashboard page displays.
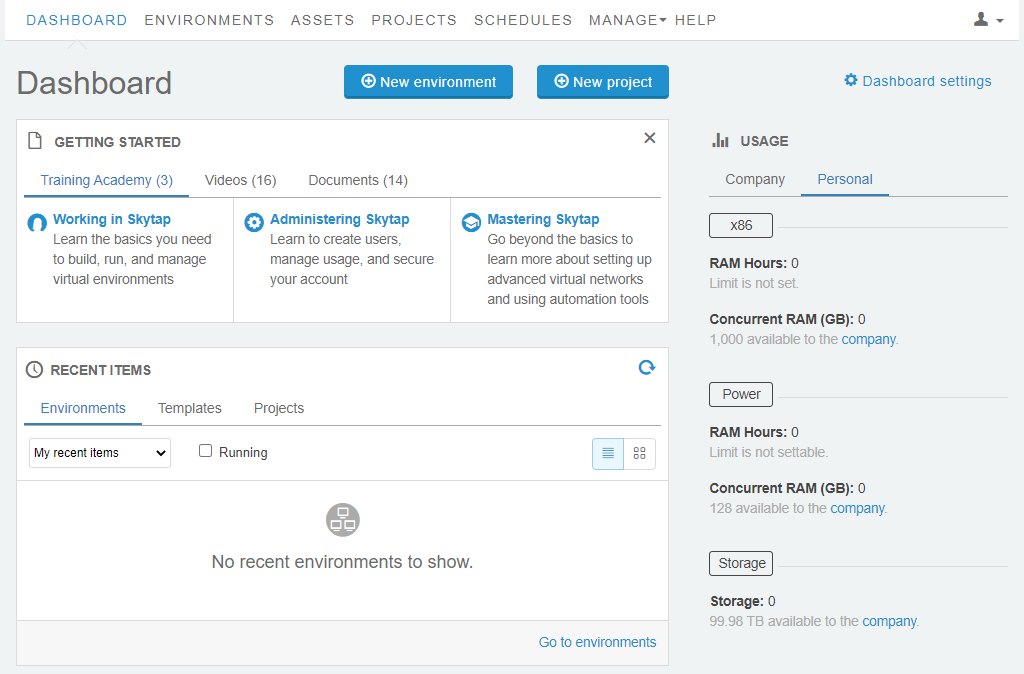
After you’ve created a Kyndryl Cloud Uplift on Azure account, we strongly recommend that you add a browser bookmark to the Instance URL for your Kyndryl Cloud Uplift on Azure account.
Adding additional users to your Kyndryl Cloud Uplift on Azure subscription
You can add other Microsoft Azure users to your Kyndryl Cloud Uplift on Azure subscription. For detailed instructions, see Creating user accounts.