Creating user accounts
You must be an administrators or user manager to create user accounts. User managers can’t create administrator accounts.
A company account can have up to 7,500 users.
For an overview of Kyndryl Cloud Uplift user roles and access permissions, see User roles and access permissions.
Contents
Creating a user
To create a user account
-
In the navigation bar, click Manage > Users.
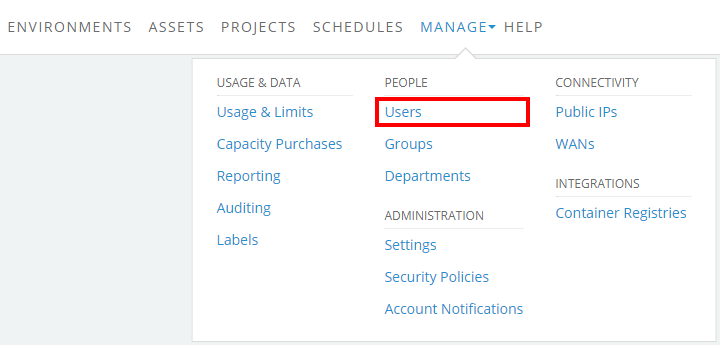
If the Manage button isn’t visible, your account doesn’t have administrator permissions.
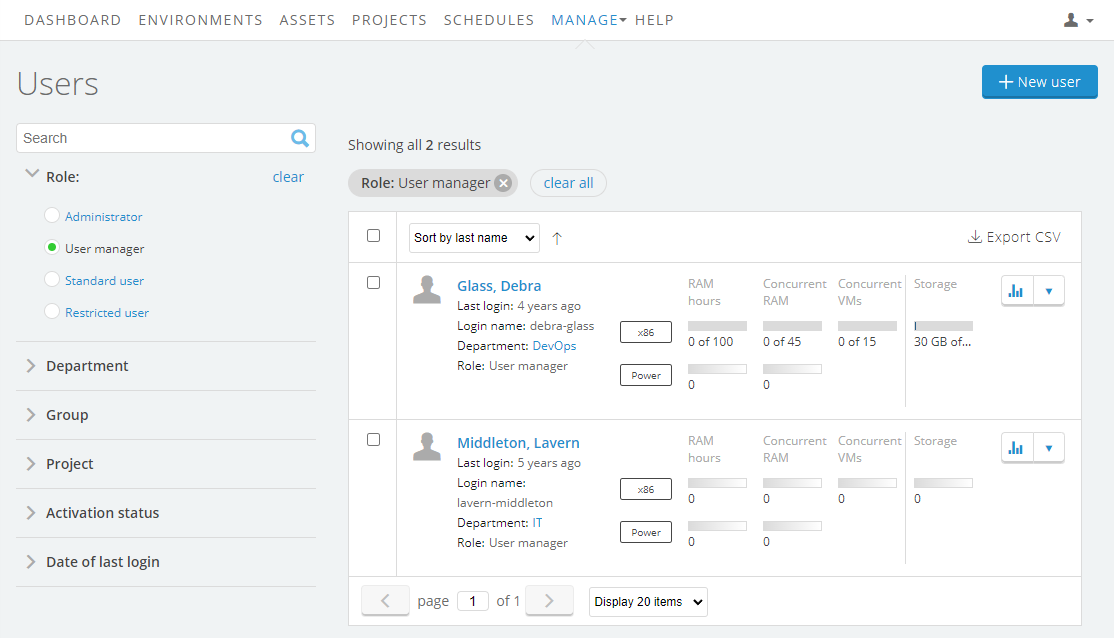
The Users page displays.
-
Click
 New User. The New User page displays.
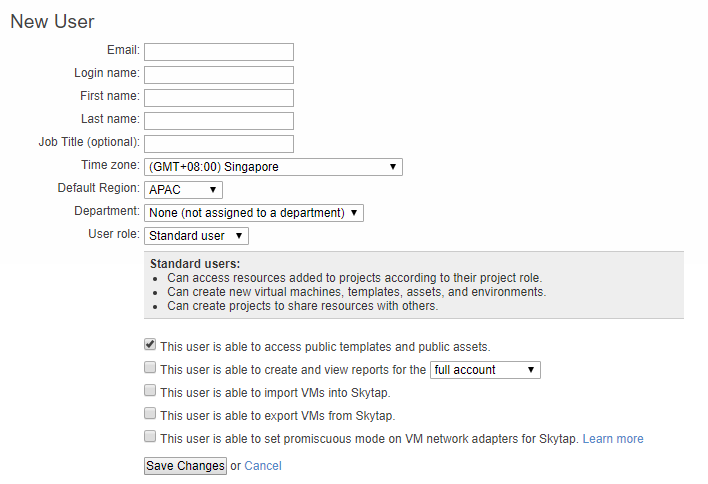
-
(Optional) If your account is enabled for single sign-on, an Enable Single Sign-on option appears. To validate the user’s sign in via SSO, click Enable Single Sign-on; to use standard password-based authentication, leave this option unchecked.

If you’re adding a user from Microsoft Azure, the Enable Single Sign-on option is enabled. SSO authentication will be manged through Microsoft Azure.
-
Add the following information:
-
A valid Email address. Users receive important emails, including browser activation links and usage notifications.
Notes
- If you're adding a user from Microsoft Azure, use their Azure account email address.
- Kyndryl Cloud Uplift on Azure supports both organizational and personal Azure accounts.
-
A unique Login name (by default, the email address provided above).
Notes
- If you're adding a user from Microsoft Azure, Login name, First name, and Last name aren't displayed; they're determined by your Microsoft Azure account.
- If you're using SSO, the login name must be a valid email address.
- First name
- Last name
- Time zone
- Default Region
- A Department (optional). Assign the user to a department for usage tracking and management. For more information, see Managing departments.
- A User role. For a description of each option, see User roles.
-
- (Optional) Enable or disable the user’s permission to access public templates and assets, create and view reports, import VMs, export VMs, and more. For more information, see Additional user permissions.
- Click Create New User.
- Kyndryl Cloud Uplift sends an activation link to the user’s email address. The user must click the activation link to validate the email address and activate the account. If Browser activation is enabled, the link also activates the user’s browser.
Creating a large number of users
Bulk actions, like creating a large number of users, can be automated through the Kyndryl Cloud Uplift REST API.
For example, the Kyndryl Cloud Uplift GitHub repository includes a sample Python script and CSV file for creating a large number of users during account setup.
Thoroughly test any sample code before using it in your account.