Managing groups
Groups help you manage access to project resources for a set of related users.
- A user can belong to multiple groups.
- Your company account can have up to 100 groups.
- Groups are managed by administrators and user managers.
For example, you can create a group of related users (members of Team B) and add that group to multiple projects in various project roles (participant in Project X, viewer in Project Y, etc.). When a new user joins your organization, add the user to the group; the user inherits the group’s permissions across all of the projects.
You can’t assign resources to a group directly. Use projects to manage resource assignment for groups. For more information about projects, see Sharing resources with projects.
Contents
Creating and populating a group
To create a group
-
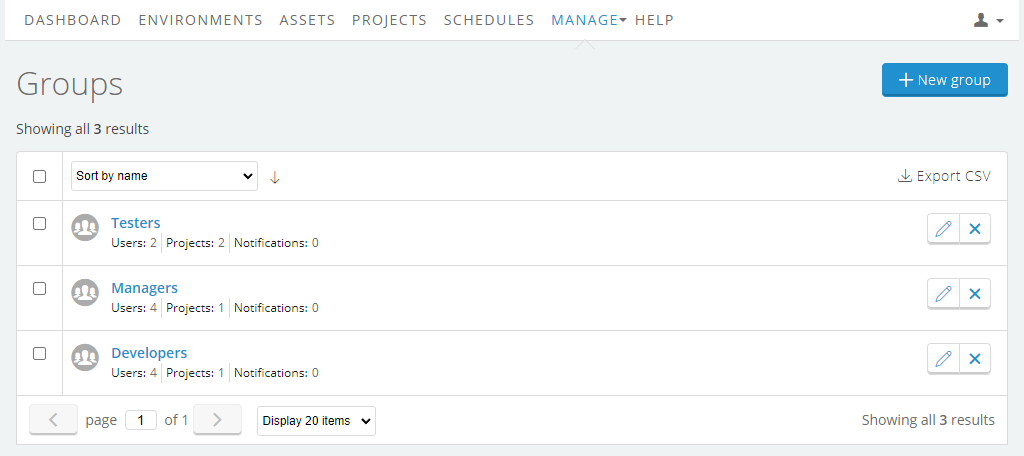
From the navigation bar, click Manage > Groups.

The Groups page displays.
-
Click
 (New Group). The Create Group window displays.
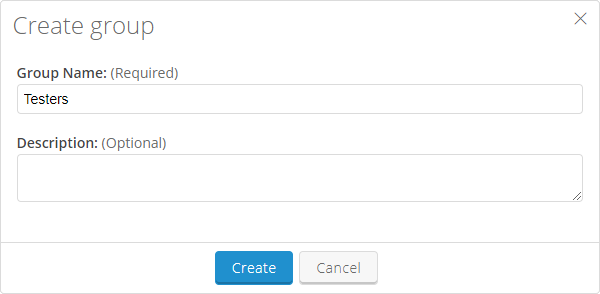
- Type a Group Name and (optionally) a Description that displays on the group detail page.
- Click Create. Once you’ve created the group, it displays in the group list.
To edit an existing group
-
Next to the group you want to edit, click
 (Edit group). The Update Group window displays.
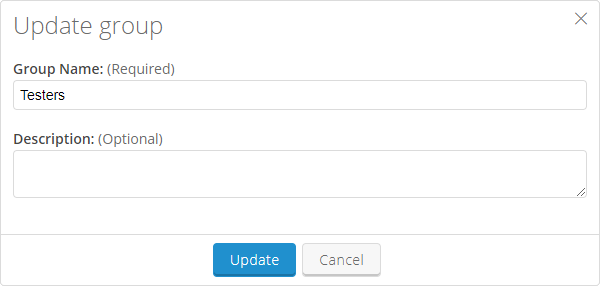
- Change the Group Name or the Description.
- Click Update. The changes display on the group list.
To add users to a group
-
Click on the group name. The group detail page displays.
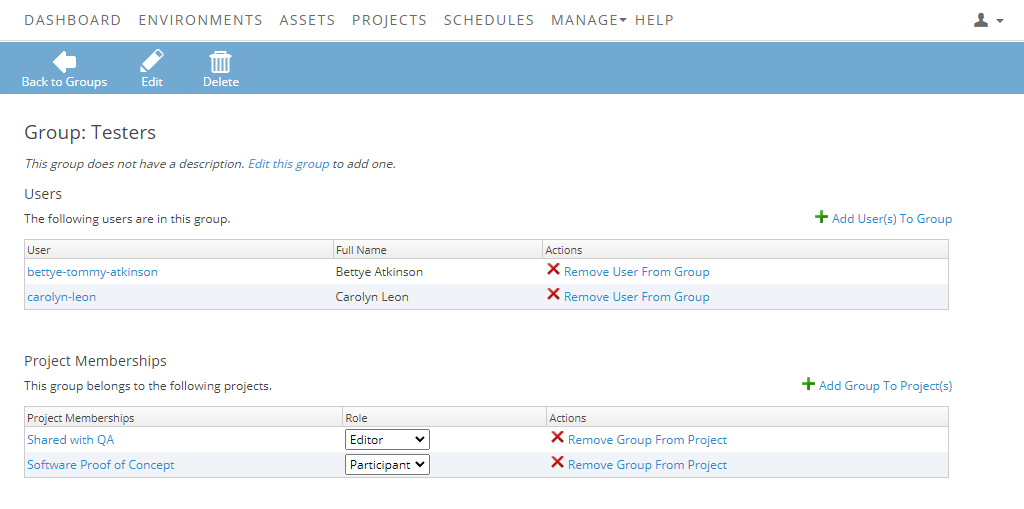
- Click Add User(s) To Group to display a list of all users in the account.
-
Click Add To Group next to the name of every user to add to the group. They appear in the list:
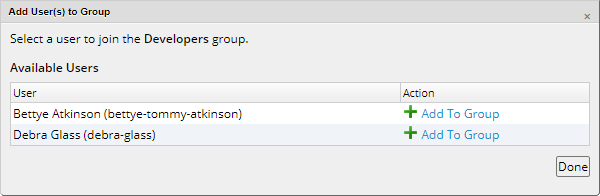
- Click Done.
Adding groups to a project
Projects help you manage collaboration and resource sharing for a team. You can add individual users directly to projects or add them as part of a group. When you add a group, all members of that group have access to the project based on the project role you assign.
To add a group to a project
-
Click Add Group To Project(s). All of the projects in the account display.
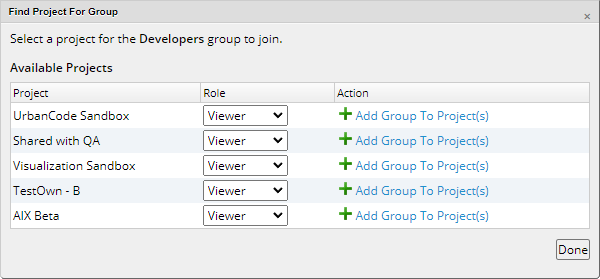
- Select a Role to assign to the group members in the project. For more information about project roles, see Sharing resources with projects.
- Click Add Group to Project(s).