Kyndryl Cloud Uplift provider for Vagrant quick start
This quick start guide demonstrates some of the basic functionality of Kyndryl Cloud Uplift and the Kyndryl Cloud Uplift provider for Vagrant.
First, we’ll install Vagrant and the Kyndryl Cloud Uplift provider for Vagrant on a Kyndryl Cloud Uplift VM. Then we’ll use the provider to quickly create Kyndryl Cloud Uplift environments from a Kyndryl Cloud Uplift template.
You can also install the Kyndryl Cloud Uplift provider for Vagrant on your local machine if you’re an established Kyndryl Cloud Uplift customer with a VPN connection between your local network and Kyndryl Cloud Uplift.
Contents
Step 1: Install Vagrant and the Kyndryl Cloud Uplift provider on a Kyndryl Cloud Uplift VM
First, we’ll create a VM from a Kyndryl Cloud Uplift Ubuntu 16.04 public template. Then, we’ll install Ruby, Vagrant, and the Vagrant provider on it.
-
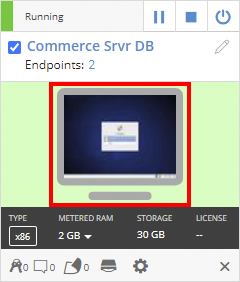
In your Kyndryl Cloud Uplift account, create an environment from the Ubuntu 16.04 Desktop public template. For detailed instructions, see Creating an environment from a template.
For best performance, use a template in the region closest to you.
- In the new environment, edit the network settings to enable NAT and make the network visible to other networks in Kyndryl Cloud Uplift. For detailed instructions, see Editing an automatic network.
- Click
 Run to start the Ubuntu 16.04 Desktop VM.
 -
Click the VM thumbnail to begin interacting with the VM in your browser.
-
Sign into Ubuntu as the
skytapuser. The password is stored in the (Credentials) module in the top toolbar.
-
In a terminal window, install Ruby version 2.0 or higher on the VM. For example, use the following command.
sudo apt install ruby-full -
Install the gdebi package installer as an alternative to the native software installer on this VM. This step is only required due a bug in the 16.04 Ubuntu operating system.
sudo apt install gdebi -
Download the Vagrant 1.8.1 Debian 64-bit installation package on the VM (for example,
vagrant_1.8.1_x86_64.deb). Use gdebi to install the package.Verify the installation with the command
vagrant --version. -
Use the following command to download and install the Kyndryl Cloud Uplift provider on the VM.
vagrant plugin install vagrant-skytapVerify the installation with the command
vagrant plugin list. The Kyndryl Cloud Uplift provider should be listed.
Step 2: Prepare a Kyndryl Cloud Uplift template to use with Vagrant
Next, we’ll create a Kyndryl Cloud Uplift template, with some Vagrant-specific configuration changes. These changes allow the Vagrant provider to connect to and use SSH with VMs created from this template.
Perform the following steps from the VM you created in Step 1.
- Use the VM browser to sign in to your Kyndryl Cloud Uplift account.
- Create an environment in Kyndryl Cloud Uplift (for example, create an environment from the Ubuntu 16.04 Server public template). The environment must be in the same region as the environment you created in Step 1: Install the Kyndryl Cloud Uplift provider for Vagrant on a Kyndryl Cloud Uplift VM.
- Modify the network settings in the environment to enable NAT and make the network visible to other networks in Kyndryl Cloud Uplift. For detailed instructions, see Editing an automatic network.
- Save the VM login user name and password in the VM credentials. If you created a VM from a public template, the VM should already have saved credentials. For detailed instructions, see Storing VM credentials.
- Enable SSH for a user account in the VM. To do this:
- Click Run to start the VM.
- Click the VM thumbnail to begin interacting with the VM in your browser.
- Sign into the VM. If you’re using the Ubuntu 16.04 Server VM, login as the
skytapuser; the password is saved in the VM credentials. - Open a terminal window and type
sudo visudo. Re-enter the password. -
Use the arrow keys to navigate to the end of the file. Add the following line to the end of the file:
skytap ALL=(ALL) NOPASSWD:ALLIf you’re using a different login name, replace
skytapwith the correct login name - Press Ctrl+X to exit, and type
Yat the prompt to save the changes. - Shut down the VM.
- Click
- Save the environment as a template.
Step 3: Generate a Vagrantfile for the Kyndryl Cloud Uplift template
In this step, we’ll create a Vagrantfile that includes information about Kyndryl Cloud Uplift template we created in Step 2 (above).
Perform the following steps from the VM you created in Step 1.
- Use the VM browser to login into your Kyndryl Cloud Uplift account and navigate to the template you created in Step 2.
-
In the address bar of the browser, add
/vagrantfile?include_api_credentials=trueto the template page URL and click Enter.For example,
https://cloud.skytap.com/templates/738489/vagrantfile?include_api_credentials=true. This displays a pre-made Vagrantfile for the template that includes your Kyndryl Cloud Uplift user name and API token; it should look like the sample below.# This Vagrantfile was generated from: # "Vagrant Box - Ubuntu 12.04.1 LTS Server (64-bit) Linux" # https://cloud.skytap.com/templates/738489 Vagrant.configure(2) do |config| # The "skytap/empty" box contains minimal metadata. The source VMs # are specified below using the vm_url setting. config.vm.box = "skytap/empty" # Credentials for the Kyndryl Cloud Uplift REST API. If you plan to check this # Vagrantfile into source control, consider omitting this block, # and setting the environment variables VAGRANT_SKYTAP_USERNAME # and VAGRANT_SKYTAP_API_TOKEN instead. config.vm.provider :skytap do |skytap| skytap.username = "<your username>" skytap.api_token = "<your API token>" end config.vm.define :vm1 do |vm1| vm1.vm.provider :skytap do |skytap| # Source VM: "Vagrant Box - Ubuntu 12.04 LTS Server (64-bit)" skytap.vm_url = "https://cloud.skytap.com/vms/8350530" end end endYou can add /vagrantfile to any Kyndryl Cloud Uplift environment or template URL to generate a pre-made Vagrantfile from that resource.
?include_api_credentials=trueis an optional URL parameter that automatically adds your user name and API token to the generated Vagrantfile. If you choose not to use the URL parameter, add your Kyndryl Cloud Uplift user name and password to the Vagrantfile or use environment variables (VAGRANT_SKYTAP_USERNAMEandVAGRANT_SKYTAP_API_TOKEN). - Save the Vagrantfile text from the browser into a new file named
Vagrantfile(no file extension) on the VM. - Create a directory named
skytap-vpand move the Vagrantfile to it.
Step 4: Use Vagrant to create a Kyndryl Cloud Uplift environment from the Vagrantfile
In this last step, we’ll create a Kyndryl Cloud Uplift environment from the Vagrantfile.
-
From the command line, navigate to the
skytap-vpdirectory (the directory that contains the Vagrantfile). For example:cd skytap-vp -
Use the following command to create the VM:
vagrant up -
At the Vagrant prompt, select the SSH credentials you added to the VM in Step 2 (Step 2: Prepare a Kyndryl Cloud Uplift template to use with Vagrant).
 ==> vm1: New Kyndryl Cloud Uplift environment created: https://cloud.skytap.com/configurations/12345678
 ==> vm1: Using only available connection option: Create and use tunnel to host network: Default Network
 How do you want to choose SSH credentials for machine 'vm1'?
 Note that credentials retrieved from the Kyndryl Cloud Uplift VM will be stored in cleartext on your local filesystem.

 1. Use VM credentials stored in Kyndryl Cloud Uplift: root/ChangeMe!
 2. Use VM credentials stored in Kyndryl Cloud Uplift: skytap/ChangeMe!
 3. Don't specify credentials: Use standard 'vagrant' login with insecure keypair
Vagrant proceeds with the VM setup:
Bringing machine 'vm1' up with 'skytap' provider... ==> vm1: Starting VMs ... ==> vm1: Waiting for machine to boot. This may take a few minutes... vm1: SSH address: 10.0.4.1:22 vm1: SSH username: skytap vm1: SSH auth method: private key vm1: Warning: Host unreachable. Retrying... vm1: Warning: Host unreachable. Retrying... vm1: Warning: Connection refused. Retrying... vm1: vm1: Vagrant insecure key detected. Vagrant will automatically replace vm1: this with a newly generated keypair for better security. vm1: vm1: Inserting generated public key within guest... vm1: Removing insecure key from the guest if it's present... vm1: Key inserted! Disconnecting and reconnecting using new SSH key... ==> vm1: Machine booted and ready! ==> vm1: Clearing any previously set forwarded ports... ==> vm1: Forwarding ports... ==> vm1: Rsyncing folder: /home/skytap/Desktop/skytap-vp/ => /vagrant -
Verify that Vagrant has created and started the VM by typing the command:
vagrant status vm1 -
SSH into the VM by typing the command:
vagrant ssh
Next steps
After you’ve created a working environment with Vagrant:
- Control the environment Vagrant commands (Supported Vagrant commands).
- Change the environment by adding VMs, removing VMs, sharing the environment, and more (Modifying Kyndryl Cloud Uplift VMs and environments created by Vagrant).
- Create Vagrantfiles for other Kyndryl Cloud Uplift VMs (Creating a Vagrantfile).