Adding learning content to a course in Course Manager
There are three types of learning content that you can add to a course: published content, attachments, and a Manual.
Contents
Adding published content to a course
Use published content to add limited HTML content such as instructions, an introduction, or a help link to a course. Course published content displays on the Resources tab in the Learning Console in the Course information section. For more information about how to add published content to a course, see Creating a course.
Adding attachments to a course
Use attachments to add files such as a PDF lab guide to a course. Course attachments display on the Resources tab in the Learning Console in the Course information section under Attachments.
To add attachments to a course
- From the Course Manager navigation bar, click Courses. The Courses page displays.
- Click the name of the course that you want to edit. The details page for the course displays.
- On the course details page, click the Course actions drop-down menu, and then click Attachments.
-
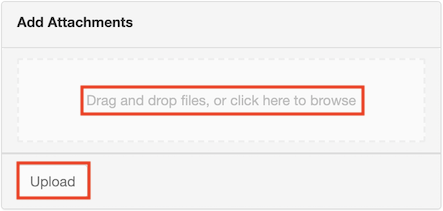
Either drag a file into the Add Attachments box or click in the box to select a file using the file browser. Then click Upload.
Adding a Manual to a course
Use a Manual to add long-form, rich text content to a course. The Manual displays on the Manual tab in the Learning Console. Lab end users can also print a Manual or save it as a PDF on their local computer.
For information about adding a Manual to a course with the Course Manager Manual Manager, see Kyndryl Cloud Uplift Course Manager – Course Manual Manager.
To add a Manual to a course
- From the Course Manager navigation bar, click Courses. The Courses page displays.
- Click the name of the course that you want to edit. The details page for the course displays.
- On the course details page, click the Course actions drop-down menu, and then click Manual.
- On the Manual details page, click the Manual actions drop-down menu, and then click Edit.
-
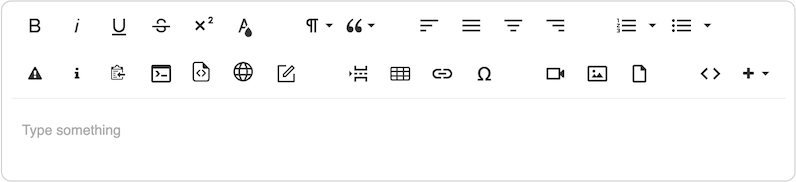
On the Edit Manual page, use the rich text editor to add content to your Manual. For more information about how to use the rich text editor, see Editing a Manual.
Notes
- Click
 (Save) to explicitly save changes to your Manual as you are working on it (the Manual is automatically saved periodically).
 - Click
 (Preview) to preview the Learning Console.
 - Click
 (Close) to automatically save changes to the Manual, close the rich text editor, and return to the Manual details page.
 - Click
 (Revert) to discard all changes since you last explicitly saved the Manual. This button is only enabled if you have explicitly saved the Manual since you last published it (or since you created it if it has never been published).
 - Click
 (Discard Draft) to discard all changes since you last published the Manual (or since you created it if it has never been published).
- Click
-
Click
 (Publish) to allow lab end users to view the Manual alongside their labs. After you confirm that you want to publish the Manual, the Manual details page displays with the following message and a Publishing Manual version.
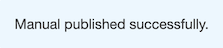

If you publish updates to a Manual that lab end users have already accessed, only those who haven’t yet accessed the Manual will see the updates.
Viewing Manual attachments
You can view images and files that have been uploaded to a Manual on the Manual Attachments page. For more information about how to add images and files to a Manual, see Inserting an image and Uploading a file.
To view Manual attachments
- On the Manual details page, click the Manual actions drop-down menu, and then click Attachments. The Manual Attachments page displays.
-
On the Manual Attachments page, click an attachment to open or download it. You can also view the size of each attachment.

Images and files uploaded to a Manual appear on the Manual Attachments page immediately after the Manual is published. They appear after a short delay after an unpublished version of the Manual is saved.
Marking a Manual inactive
Mark a Manual inactive to prevent future labs provisioned from a course from displaying the Manual to lab end users. You can still make changes to a Manual while it is inactive. Mark an inactive Manual as active to display the most recently published version of the Manual to users whose labs were provisioned while the Manual was inactive, and to also display it in future labs provisioned from the course.
Lab end users who have accessed a Manual before it is marked inactive still have access to the Manual while it is inactive. This ensures a consistent experience for each user.
To mark a Manual inactive
On the Manual details page of an active Manual, click the Manual actions drop-down menu, and then click Mark inactive.
Notes
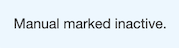
- The following message displays on the Manual details page immediately after you mark a Manual inactive:
- The following message displays anytime you view the Manual details page of an inactive Manual:

To mark a Manual active
On the Manual details page of an inactive Manual, click the Manual actions drop-down menu, and then click Mark active.
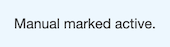
The following message displays on the Manual details page immediately after you mark a Manual active:
Viewing previously published versions of a Manual
To view a previously published version of a Manual
-
On the Manual details page, click the latest version of the Manual (this may be a draft or published version).

-
In the drop-down menu displayed, click the version of the Manual you would like to view.
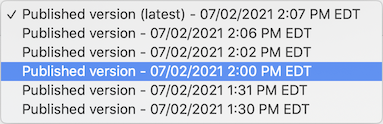
You can view previously published versions of a Manual, but you can edit only the latest version (this may be a draft or published version).