Using Resources in the Learning Console – a guide for lab end users
Click Resources at the top of the Content Pane in the Course Manager Learning Console to view additional lab resources. For more information about the Course Manager Learning Console, see Using the Learning Console – a guide for lab end users.
If Resources doesn’t display at the top of the Content Pane, click  at the top of the Content Pane, and then click Resources to view additional lab resources. Alternatively, drag the left edge of the Content Pane to the left until Resources displays at the top of the Content Pane, and then click Resources.
Contents
Using the information sections
Use the information sections in Resources to view short-form content and attachments alongside your lab.
Notes
- The Instructor information, Student information, and Lab information sections display short-form content associated with a Learning Console user.
- The Event information section displays short-form content and attachments associated with an instructor-led training event.
- The Course information section displays short-form content and attachments associated with a course.
Using short-form content
Short-form content displays information such as instructions, an introduction, or a help link.
Notes
- By default, if you click a link in the short-form content, the link opens in the Content Pane. To go back to the short-form content, click
 (Back).
 - Your administrator may configure links to open in a new browser tab.
Using attachments
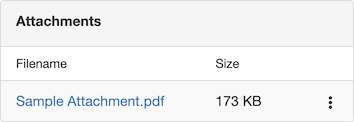
Attachments provide additional resources, such as PDF lab guides. In an Attachments section:
-
Click an attachment to open or download it. You can also view the size of each attachment.
Notes
- By default, when you click attachments, they open in the Content Pane. If they can't be displayed in the Content Pane, you are prompted to download them. Your browser settings and capabilities may affect this default behavior.
- Click (Back) to close an attachment open in the Content Pane.
- Click the drop-down menu next to an attachment, and then click Copy file URL to copy the attachment URL. You can then paste the URL into a web browser in the local computer or VM to open the link in the browser or download the attachment if it can’t be displayed in the browser.
-
To copy an attachment from the local computer to a VM:
-
Click the drop-down menu next to an attachment, and then click Send to VM(s).
Notes
- Send to VM(s) may be disabled by your administrator.
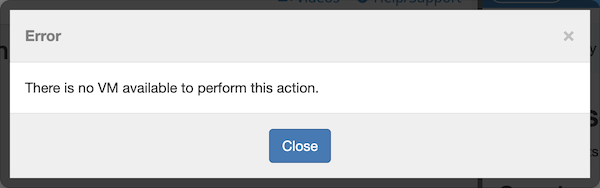
- If an error message displays when you click or hover over Send to VM(s):
- Make sure you are signed in to the target VMs.
- Make sure this icon displays in blue in the desktop icons of the target VMs. If not, contact your administrator.

- If the error message persists, wait a few minutes and try again.
- Contact your administrator for further assistance.

-
In the VM, click the Incoming File message. The VM file browser displays.

The Incoming File message may display in the VM for only a few seconds. If you can’t click it, click Send to VM(s) in the drop-down menu next to the attachment in the Content Pane again.
- Using the VM file browser, save the attachment in the VM.
-
(Optional) Click the Downloaded message to open the attachment in the VM.

The Downloaded message may display in the VM for only a few seconds, but the attachment is saved in the VM and you can access it at any time.
-
Using Ports
Your administrator can expose ports on VMs in your Kyndryl Cloud Uplift lab environment to the public internet through port forwarding. If your administrator has done this, the Ports section in Resources displays a list of the VM names, VM ports, and addresses of the services running on the VMs.