Using File Drop in the Learning Console – a guide for lab end users
File Drop allows you to easily copy files between your local computer and Kyndryl Cloud Uplift VMs. When you upload a file to File Drop, the file can be viewed or downloaded for a limited time in your local computer and Kyndryl Cloud Uplift VMs. Click File Drop at the top of the Content Pane in the Course Manager Learning Console to access File Drop. For more information about the Course Manager Learning Console, see Using the Learning Console – a guide for lab end users.
Notes
- If File Drop doesn't display at the top of the Content Pane, click
 at the top of the Content Pane, and then click File Drop to access File Drop. Alternatively, drag the left edge of the Content Pane to the left until File Drop displays at the top of the Content Pane, and then click File Drop.
 - File Drop may be disabled by your administrator.
- To interact with a VM through File Drop, the VM must have an internet connection.
Contents
Copying files when CMHelper is available for use on VMs
CMHelper is an app that may be installed on one or more of your VMs by your administrator. If CMHelper is available for use on a VM, this icon will display in blue in the VM desktop icons.

Copying a single file from your local computer to a VM
To copy a single file from your local computer to a VM
- In the local computer, click File Drop at the top of the Content Pane.
-
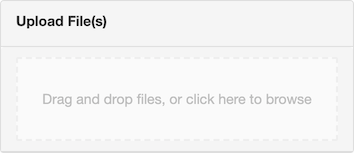
Under Upload File(s), click the box to select a file using the local computer file browser or drag a file into the box.
-
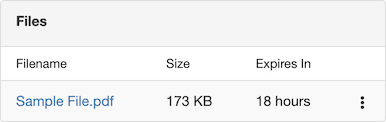
In the VM, click the Incoming File message. The VM file browser displays.

The Incoming File message may display in the VM for only a few seconds. If you can’t click it, choose one of the following to display the file browser in the VM:
- Use File Drop in the VM:
- If File Drop isn’t open in the VM, right-click in the VM desktop icons, and then click Open File Drop. The VM File Drop displays.
- In the Files section, click the file you uploaded. The VM file browser displays.
- If File Drop isn’t open in the VM, right-click
- If Send to VM(s) has been enabled by your administrator, use it to regenerate the Incoming File message:
- In the local computer, click File Drop at the top of the Content Pane (if File Drop isn’t displayed).
- Click the drop-down menu next to the file uploaded, and then click Send to VM(s).
- In the VM, click the Incoming File message. The VM file browser displays.
- Use File Drop in the VM:
- Using the VM file browser, save the file in the VM.
-
(Optional) Click the Downloaded message to open the file in the VM.

The Downloaded message may display in the VM for only a few seconds, but the file is saved in the VM and you can access it at any time.
Copying multiple files from your local computer to a VM
To copy multiple files from your local computer to a VM
- In the local computer, click File Drop at the top of the Content Pane.
-
Under Upload File(s), click the box to select files using the local computer file browser or drag files into the box.
-
In the VM, click the New Files Uploaded message. The VM File Drop displays.

The New Files Uploaded message may display in the VM for only a few seconds. If you can't click it and File Drop isn't open in the VM, right-click
in the VM desktop icons, and then click Open File Drop. The VM File Drop displays. - For each file uploaded:
-
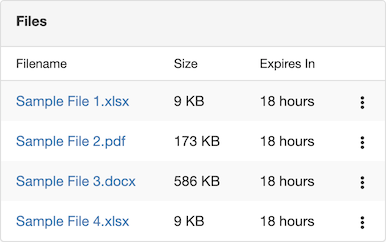
In the Files section, click the file. The VM file browser displays.
- Using the VM file browser, save the file in the VM.
-
(Optional) Click the Downloaded message to open the file in the VM.

The Downloaded message may display in the VM for only a few seconds, but the file is saved in the VM and you can access it at any time.
-
Copying files from a VM to your local computer
To copy files from a VM to your local computer
-
In the VM, if File Drop isn’t open, right-click
in the desktop icons, and then click Open File Drop. The VM File Drop displays. -
Under Upload File(s), click the box to select files using the VM file browser or drag files into the box.
- In the local computer, click File Drop at the top of the Content Pane.
-
For each file uploaded, click the file in the Files section to open it in the web browser or download it if it can’t be displayed in the browser.
Copying a single file from a VM to another VM
To copy a single file from a VM (source VM) to another VM (destination VM) when CMHelper is available for use on both VMs
-
In the source VM, if File Drop isn’t open, right-click
in the desktop icons, and then click Open File Drop. The VM File Drop displays. -
Under Upload File(s), click the box to select a file using the VM file browser or drag a file into the box.
-
In the destination VM, click the Incoming File message. The VM file browser displays.
The Incoming File message may display in the destination VM for only a few seconds. If you can’t click it, choose one of the following to display the file browser in the destination VM:
- Use File Drop in the destination VM:
- If File Drop isn’t open in the destination VM, right-click in the VM desktop icons, and then click Open File Drop. The VM File Drop displays.
- In the Files section, click the file you uploaded. The VM file browser displays.
- If File Drop isn’t open in the destination VM, right-click
- If Send to VM(s) has been enabled by your administrator, use it to regenerate the Incoming File message:
- In the local computer, click File Drop at the top of the Content Pane.
- Click the drop-down menu next to the file uploaded, and then click Send to VM(s).
- In the destination VM, click the Incoming File message. The VM file browser displays.
- Use File Drop in the destination VM:
- Using the destination VM file browser, save the file in the destination VM.
-
(Optional) Click the Downloaded message to open the file in the destination VM.
The Downloaded message may display in the destination VM for only a few seconds, but the file is saved in the VM and you can access it at any time.
Copying multiple files from a VM to another VM
To copy multiple files from a VM (source VM) to another VM (destination VM) when CMHelper is available for use on both VMs
- In the source VM, if File Drop isn’t open, right-click in the desktop icons, and then click Open File Drop. The VM File Drop displays.
-
Under Upload File(s), click the box to select files using the VM file browser or drag files into the box.
-
In the destination VM, click the New Files Uploaded message. The VM File Drop displays.
The New Files Uploaded message may display in the VM for only a few seconds. If you can't click it and File Drop isn't open in the VM, right-click
in the VM desktop icons, and then click Open File Drop. The VM File Drop displays. - For each file uploaded:
-
In the Files section, click the file. The VM file browser displays.
- Using the destination VM file browser, save the file in the destination VM.
-
(Optional) Click the Downloaded message to open the file in the destination VM.
The Downloaded message may display in the destination VM for only a few seconds, but the file is saved in the VM and you can access it at any time.
-
Copying files when CMHelper isn’t available for use on VMs
You can still use File Drop with a VM if the CMHelper app isn’t available for use on the VM. In this case, this icon will not display in blue in the VM desktop icons.
Copying files from your local computer to a VM
To copy files from your local computer to a VM
- In the local computer, click File Drop at the top of the Content Pane.
-
Under Upload File(s), click the box to select files using the local computer file browser or drag files into the box.
- For each file uploaded:
-
In the Files section, click the drop-down menu next to a file, and then click Copy file URL to copy the file URL.
-
In the VM, paste the URL into a web browser to open the file in the browser or download it if it can’t be displayed in the browser.
-
Copying files from a VM to your local computer or to another VM
To copy files from a VM (source VM) to your local computer or to another VM (destination VM)
- In the local computer, click
 (Configuration) at the top of the Content Pane, and then click Pop out. A dialog box displays.
 - In the dialog box, right-click Open Content Pane, and then copy the link address. The Content Pane URL is copied.
- In the source VM (and destination VM if applicable):
- Paste the Content Pane URL into a web browser. The Content Pane displays in the web browser.
- Click File Drop at the top of the Content Pane if File Drop doesn’t display. File Drop displays.
-
In the source VM, under Upload File(s) in File Drop, click the box to select files using the VM file browser or drag files into the box.
-
In File Drop on your local computer (or destination VM), for each file uploaded, click the file in the Files section to open it in the web browser or download it if it can’t be displayed in the browser.
Additional notes about File Drop
Some actions are unsupported in File Drop:
- You can’t upload video files.
- You can’t upload a file larger than the maximum allowable file size.
-
You can’t exceed your File Drop storage limit.
File Drop displays your available storage.

Files uploaded to File Drop are automatically removed after a period of time. After an uploaded file expires:
- It’s no longer available in File Drop.
- It no longer takes up storage in File Drop.
-
The file URL no longer works.
To delete a file from File Drop before it expires (to free up storage), click the drop-down menu next to the file in the Files section of File Drop, and then click Delete.