Editing an email body in Course Manager
When you edit an email body setting, use the rich text editor to customize your email body.
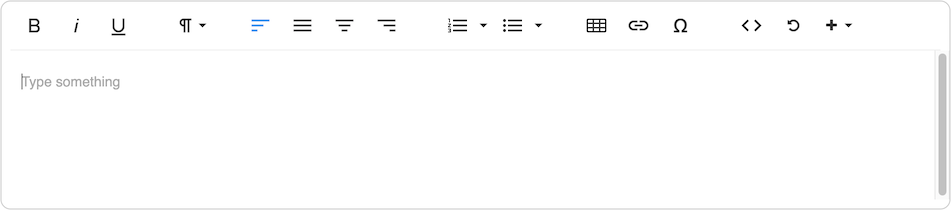
For more information about using the buttons and keyboard shortcuts in the rich text editor, click on a topic below.
Contents
Formatting text
You can apply the following formats to text using the rich text editor:
-
Bold – To use bold formatting, select the text and click
 (Bold), or just click (Bold) and begin typing. Click (Bold) again to stop using bold formatting.
 -
Italic – To use italic formatting, select the text and click
 (Italic), or just click (Italic) and begin typing. Click (Italic) again to stop using italic formatting.
 -
Underline – To use underline formatting, select the text and click
 (Underline), or just click (Underline) and begin typing. Click (Underline) again to stop using underline formatting.
Changing paragraph format
To change the paragraph format using the rich text editor
- Select the paragraphs or move the cursor to the paragraph that you want to change.
- Click
 (Paragraph Format).
 -
Choose from one of the following paragraph formats:
- Normal – Normal is the default paragraph format, which should be used for most content.
- Heading (1-4) – Headings are used to create structure for your content. There are four heading levels. Heading 1 is the most prominent heading, and Heading 4 is the least prominent.
- Code – The Code format can be used to distinguish a block as code by applying a light gray background and monospace font.
Notes
- For normal or heading formats, press Shift+Enter to insert a line break and keep the current paragraph format, or press Enter to insert a paragraph break and return to the normal format.
- For code format, press either Shift+Enter or Enter to insert a line break and keep the current code format.
- To exit code format, press Enter at the end of the last line of a section that uses the code format, and then press Enter again.
Changing text alignment
To align text using the rich text editor
- Select the paragraphs or move the cursor to the paragraph that you want to align.
- Click
 (Align Left),
  (Align Justify),
  (Align Center), or
  (Align Right).
Inserting lists
To insert a list using the rich text editor
- Select the paragraphs or move the cursor to the paragraph that you want to convert to a list.
-
Click
 (Ordered List) or
  (Unordered List). To choose a different style list marker, click
  (Down Arrow) next to the list button and choose a style.
Notes
- To add additional list items, press Enter at the end of a line in your list.
- To move to a new line without adding another list item, press Shift+Enter.
- To stop adding additional list items, move to an empty line containing a list marker. Then, press Enter or click the appropriate list button again.
- To remove list formatting, select the applicable text or place the cursor within a list item. Then, click the appropriate list button again.
- To create a nested list, press Tab in an empty line containing a list marker. This line is indented and has a different list marker. After you type the nested list item, press Enter to move to the next line of the nested list. Press Enter again to remove the additional indentation and return to the original list.
Inserting a table
To insert a table using the rich text editor
- Move the cursor where you want to insert the table.
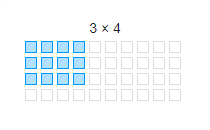
- Click
 (Insert Table).
 -
Use the grid to select the table dimensions.
Notes
- To adjust the width of a table, click and drag the left or right edge of the table.
- To adjust the width of a column in a table, click and drag the left or right edge of the column.
To access additional design options or remove a table
- Select one or more cells in the table.
-
Click one of the following:
 (Table Header) to add a header row to the top of the table. Click (Table Header) again to remove an existing table header.
 (Remove Table) to remove the table.
 (Row) and choose an option from the drop-down menu to insert a row above the selection, insert a row below the selection, or delete the row or rows that contain the selection.
 (Column) and choose an option from the drop-down menu to insert a column above the selection, insert a column below the selection, or delete the column or columns that contain the selection.
 (Table Style) and choose an option from the drop-down menu to add a dashed border to all cells in the table or shade alternate rows of the table.
 (Cell) and choose an option from the drop-down menu to merge or split cells. If multiple cells are selected, you can merge the cells. If one cell is selected, you can vertically or horizontally split the cell.
-
 (Cell Background) to change the background color of your selection. Choose a color from the color picker, or type a HEX Color code and click OK.
To restore the default background color, click
 (Clear Formatting) in the color picker.
  (Vertical Align) and choose an option from the drop-down menu to apply top, middle, or bottom alignment to the selection.
-
 (Horizontal Align) and choose from one of the following drop-down menu options to horizontally align the selection:
- (Align Left)
- (Align Center)
- (Align Right)
- (Align Justify)
 (Cell Style) to change the border of the selected cells. Choose Highlighted from the drop-down menu to apply a red border. Choose Thick from the drop-down menu to apply a thick border. Choose the drop-down menu item again to remove an existing cell style.
Inserting a link
To insert a link using the rich text editor
- Select the text or move the cursor where you want to insert the link.
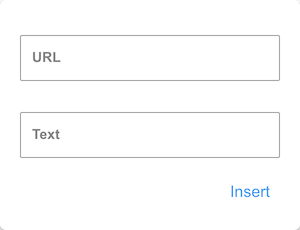
- Click
 (Insert Link).
 -
Enter the link URL in the URL field and the text that you want to display in the Text field. Then click Insert.
To open or make changes to a link
- Click the link.
-
Click one of the following:
 (Open Link) to open the link in a new tab.
 (Edit Link) to edit the link URL or display text.
 (Unlink) to remove the link.
Inserting special characters
To insert a special character using the rich text editor
- Move the cursor where you want to insert the special character.
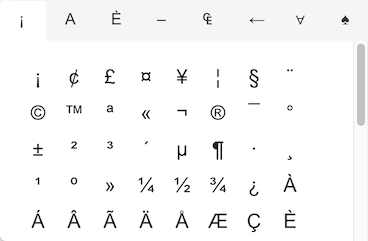
- Click
 (Special Characters).
 -
Select a category in the header row, and then select a special character.
Switching to code view
To view and edit the HTML for content in the rich text editor, click  (Code View). Click (Code View) again to switch back to the rich text editor.
Resetting to the default value
To reset email body content to the default state, click  (Reset to Default Value).
Inserting a placeholder
Use a placeholder to personalize content for each recipient.
To insert a placeholder using the rich text editor
- Select the text or move the cursor where you want to insert the placeholder.
- Click
 (Insert Placeholder).
 -
Select one of the available placeholders from the drop-down menu. Course Manager inserts the corresponding placeholder code.
To insert an available placeholder in an email subject, type the placeholder code in the email subject.
Keyboard shortcuts
| Rich text editor effect | Windows keyboard shortcut | macOS keyboard shortcut |
|---|---|---|
| Bold | Ctrl+B | ⌘+B |
| Italic | Ctrl+I | ⌘+I |
| Underline | Ctrl+U | ⌘+U |
| Insert link | Ctrl+K | ⌘+K |