Managing account settings in Course Manager
Course Manager administrators can change many of the settings in their Course Manager account.
Contents
Accessing account settings
To access account settings
From the Course Manager navigation bar, click Admin > Settings. The Settings page displays.
The Admin menu is visible only to Course Manager administrators. For more information, see User permissions within Course Manager.
Finding an account setting
To find an account setting
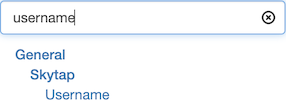
On the Settings page, use one of the following tools:
-
Search – Type a term in the search field. The table of contents displays all categories, subcategories, and setting names that contain the term. Click a category, subcategory, or setting name to navigate to it in the scrollable settings form.
Notes
- To search for a term anywhere on the Settings page, including in setting descriptions and values, use your browser menu to find the term on the page (alternatively, while on the page, press Ctrl+F for Windows or ⌘+F for macOS).
- To clear the search field and display the default table of contents, click
 (Clear) in the search field.
-
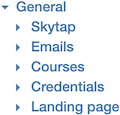
The table of contents – Click a category in the table of contents. The subcategories and setting names in the category display, and the scrollable settings form navigates to the category.
Notes
- Click a subcategory in the table of contents to display additional subcategories and setting names and navigate to the subcategory in the scrollable settings form.
- Click a setting name in the table of contents to navigate to the setting in the scrollable settings form. Course Manager highlights the setting entry field for text and drop-down fields.
- Click an expanded category or subcategory in the table of contents to collapse it and navigate to it in the scrollable settings form.
-
The scrollable settings form – Hover over the scrollable settings form and scroll up or down to find the setting you are looking for.
Making changes to an account setting
To make changes to an account setting
- On the Settings page, click the entry field next to the setting you want to change in the scrollable settings form.
-
Edit the setting.
Notes
- For more information about editing email body settings, see Editing an email body setting.
- For more information about editing settings that allow multiple items, see Editing a setting that allows multiple items.
- Settings marked with an asterisk can't be left blank.
- Changing the value of a setting may change the visibility of related settings in the scrollable settings form. The table of contents adjusts to match the scrollable settings form.
- If certain features are disabled in your account, the associated settings on the Settings page are hidden. Work with the Course Manager team to enable these features and access the associated settings.
-
(Optional) Edit other settings.
- Click
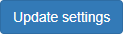 (Update settings) to save your changes, or click
 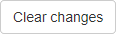 (Clear changes) to discard them.
Editing an email body setting
You can customize the body of emails sent by Course Manager with rich text, tables, links, and placeholders.
You can also use placeholders in the subjects of warning, instructor-led training, and on-demand lab emails sent by Course Manager. For more information, see Inserting a placeholder.
To edit an email body setting
-
On the Settings page, in the entry field next to an Email body setting in the scrollable settings form, click
 (Edit). The rich text editor displays.
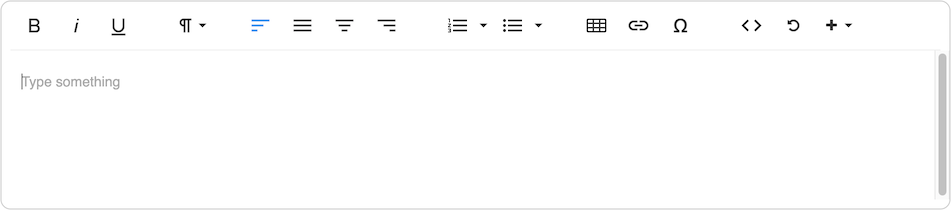
- Use the rich text editor to customize the email body. For more information about how to use the rich text editor, see Editing an email body.
- Click
 (Close editor) to close the rich text editor.
Editing a setting that allows multiple items
To edit a setting that allows multiple items
- In the scrollable settings form on the Settings page, click
 (Add) to the right of a setting that allows multiple items. One or more new entry fields display.
 - (Optional) Click (Add) again to add additional items. One or more new entry fields display for each one.
-
Type values into the entry fields for each item.
Notes
- To delete an item, click
 (Delete) next to the item.
 - To move an item one earlier in a list of items, click
 (Move earlier) next to the item.
 - To move an item one later in a list of items, click
 (Move later) next to the item.
 - When you add a custom data or metadata attribute, multiple entry fields display. Click
 (Edit) next to an attribute to hide these fields, or to display them if they're hidden.
- To delete an item, click