Creating a template for the lab environments
Before you can create courses, events, and on-demand labs in Course Manager, you must first create a template in Kyndryl Cloud Uplift for the lab environments:
-
Create a Kyndryl Cloud Uplift environment that is configured and ready for lab use.
For help with common configuration tasks, see Editing VM settings, Transferring files to a VM, Adding VMs to an environment, Installing CMHelper on a VM, and Installing CMSysHelper on a VM.
During this step, we recommend that you:
-
Adjust VM CPU and RAM settings
Make sure each VM has enough CPU and RAM to meet the minimum system requirements for the operating system and applications installed on it. As with physical machines, VMs perform poorly if they don’t have enough resources; under-allocated VMs could result in slow performance or stuck VMs.
-
Check network connectivity
Verify that each VM has the network connectivity needed.
For example, if lab end users need to access resources on the public Internet, verify that outbound internet access is enabled. Or, if VMs need to communicate within the environment, make sure they can ping one another.
-
Adjust VM operating system settings
Sign in to each VM and adjust the operating system settings, as needed:
- Confirm that the operating system keyboard language settings match the lab end user’s physical keyboard and the VM keyboard language settings.
- Disable the screensaver, or set the screensaver to a static image or solid color. If the Secure Remote Access (SRA) browser client is left open on an idle tab, screensavers with moving or changing images can unnecessarily consume bandwidth.
- Confirm that the VM doesn’t have any unwanted automatic sleep, hibernate, or shut down settings. Kyndryl Cloud Uplift honors the guest operating system settings, and will suspend the VM if it enters “sleep mode.” Similarly, Kyndryl Cloud Uplift powers off or shuts down the VM if the operating system hibernates or shuts down.
- Use 16-bit display settings (instead of 32-bit display settings). This will also reduce the amount of bandwidth consumed during the browser client session.
-
Add VM credentials
Include any user names and passwords that the lab end user needs on the VM Credentials pages. This allows lab end users to access the credentials while using their labs.
For instructions, see Storing VM credentials.
If you’re storing VM credentials, verify that the credentials work as expected within the VM. For example, open the browser client and attempt to sign in to the VM by inserting the VM credentials.
-
Consider file sharing requirements
If lab end users need access to learning materials while using their labs, make sure those materials are accessible from the VM.
-
Check whether you have any public IP addresses attached to the VMs.
Any public IP addresses attached to VMs in an environment display in the Networking Settings section of the Settings toolbar. Click Public IPs to display a list of attached public IP addresses. Click the VM hostname and IP address to navigate to the VM Network Adapter settings page, where you can view or remove the public IP address.
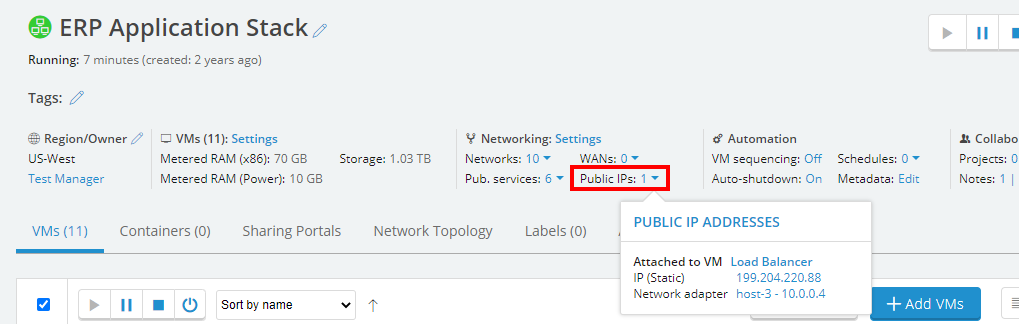
When an environment is saved as a template, the public IP address settings are also saved. This means that each lab environment created from the template will inherit the public IP address settings.
-
If you have any static public IP addresses attached to the VMs, remove them. Otherwise, the VM in each copy of the environment will be attached to the same static IP address, and only one of those VMs can run at a time.
-
If you have any dynamic public IP addresses attached to the VMs, either remove them or make sure you have enough public IP addresses for all of the lab environment VMs to run at the same time (you may need to work with an administrator to view the number of public IP addresses in the account).
-
- Save the environment as a template. Course Manager uses this template to create a copy of the environment for each lab end user.
-
Add the template to the Course Manager Templates project.
Templates aren’t available to Course Manager until they’re added to the Course Manager Templates project.
- (Optional) To improve your usage reports, add usage labels to the template. These labels are copied to the lab environments created from the templates. For more information about usage labels, see Using labels for in-depth usage reporting.
Next step: Create a course or set consumption control measures
After you create one or more Kyndryl Cloud Uplift templates, create a course that features these templates. For instructions, see Creating a course. If you are creating a course for on-demand labs, first set consumption control measures.