Creating an automatic network
An automatic network provides DHCP and DNS services for the VMs attached to it, along with outbound connectivity to the public Internet.
To learn more about automatic networks, see Network overview.
To create an automatic network in an environment
-
Navigate to the environment Network Settings page.
-
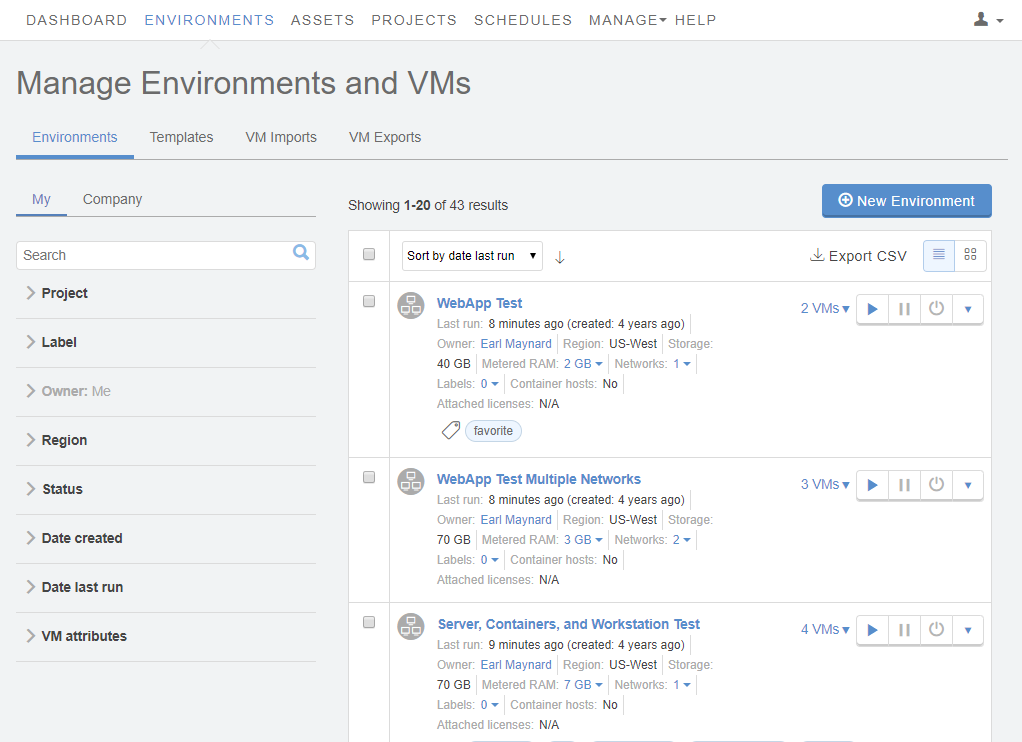
Click Environments > Environments to display a list of environments you own or that have been shared with you.
-
Click the name of an environment to open the Environment Details page view.
-
Click the Networking: Settings link in the environment overview.
 The Network Settings page displays.
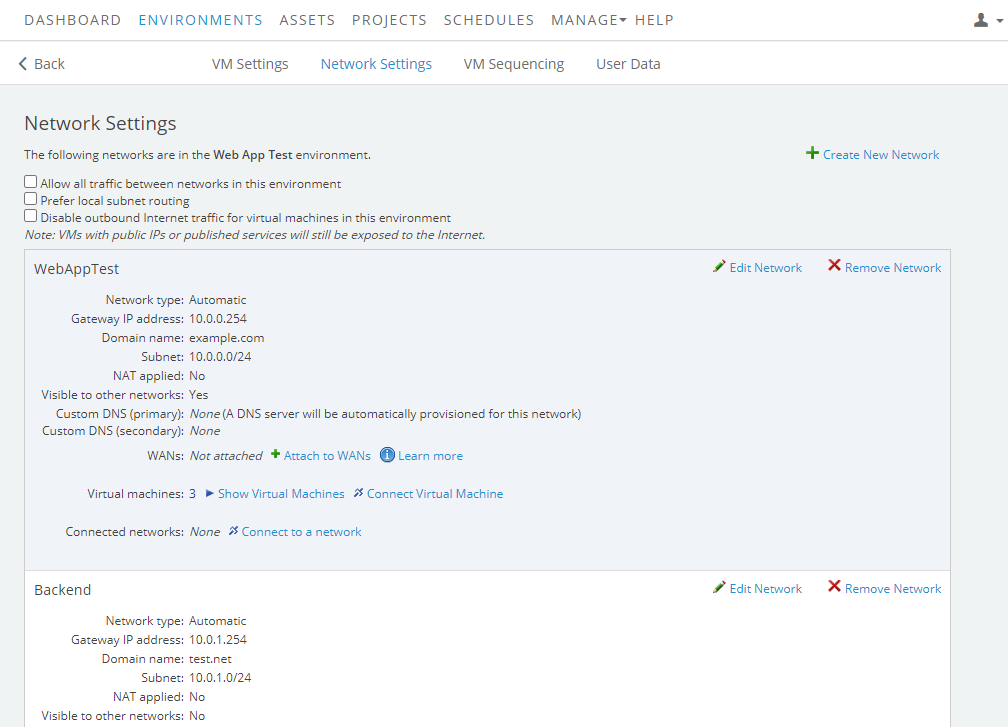
-
- Click
 Create New Network
 - In the Create network window, verify the Network type is Automatic.
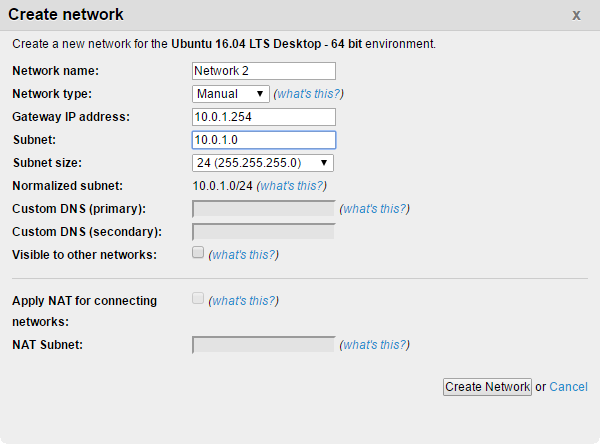
- Kyndryl Cloud Uplift provides default options for the remaining network properties. You can replace these with custom values. For more information about these fields, see Automatic network properties below.
- Click Create Network.
- A new network doesn’t have any virtual machines connected to it. To connect VMs to the network, see Attaching VMs to networks.
Automatic network properties
| Network name | The name for this network, used for reference and to distinguish it from other networks in the same environment. The maximum length of a network name is 255 characters. |
| Network type (read only) |
Automatic or Manual. Notes
|
| Gateway IP address | By default, this is the last address in the subnet (for instance, 10.0.0.254 for a /24 subnet). You can change the gateway IP address if your network requires it. |
| Domain name | The domain associated with the network. In most cases, you can use the default test.net. However, you may want to change it when connecting these networks to an in-house VPN, or to correspond to a virtualized domain such as a Windows domain, among other cases.Domain name notes
|
| Subnet and Subnet size | The IP address and subnet mask for the network. The subnet size must be between 16 and 30. For restricted and recommended subnets, see Avoiding restricted subnets and IP addresses. The subnet and subnet size are automatically calculated to create the Normalized subnet value. |
| Visible to other networks | Allows this network to be connected to networks in other environments. For more information on this feature, see Networking between environments. |
| Custom DNS | Allows you to designate your own primary and secondary DNS servers. For more information, see Manually configuring domain name servers. |
| Apply NAT for connecting networks | Enables Network Address Translation to prevent IP address conflicts with connected networks. For more information, see Using Network Address Translation (NAT) to avoid IP address conflicts. |
| NAT Subnet | If Apply NAT for connecting networks is selected, the NAT Subnet box is auto-filled with a subnet that doesn’t overlap with any other networks you have access to. The size of the subnet defines the size of the external IP address pool. For more complex network configurations, you can also manually enter a NAT subnet. To avoid running out of NAT IP addresses, set the NAT subnet to a size large enough to handle multiple NAT connections. We recommend a /22 subnet or larger. It is easier to set a large subnet during the initial network configuration than to extend the NAT subnet after NAT IP addresses have been assigned. The valid subnets are 16–30 (inclusive). |