Configuring TCP/IP network settings for an AIX VM
The current Kyndryl Cloud Uplift templates enable DHCP in the guest OS for compatibility with Kyndryl Cloud Uplift automatic networking.
- AIX 7.1 TL5 SP2
- AIX 7.2 TL2 SP2
We strongly recommend that you use the latest version of the templates. But if you’re already using VMs created from previous versions of the templates, use these instructions to manually configure TCP/IP settings in the AIX System Management Interface Tool (SMIT). This prevents network issues during file transfers and other intensive operations.
These steps aren’t necessary unless you have pre-2018 versions of Kyndryl Cloud Uplift AIX templates.
Manually configuring TCP/IP settings for the guest OS of an AIX VM is a two-step process. First, determine the settings of the automatic network that the AIX VM should connect to. Second, apply appropriate settings in the guest OS of the AIX VM.
Step 1 – Finding the automatic network settings
Before you can configure network settings for an AIX VM in an environment, you need to know the network configuration for the environment.
-
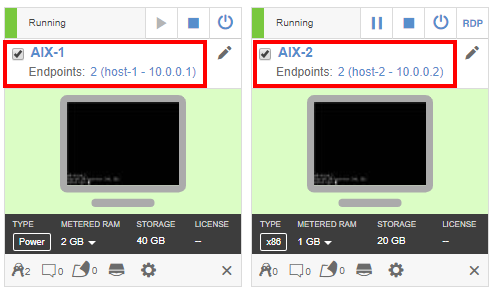
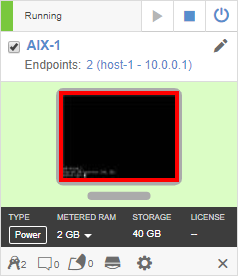
From the Environment Details page, note the hostname and IP address for each AIX VM in the environment.
-
Click Networking: Settings.
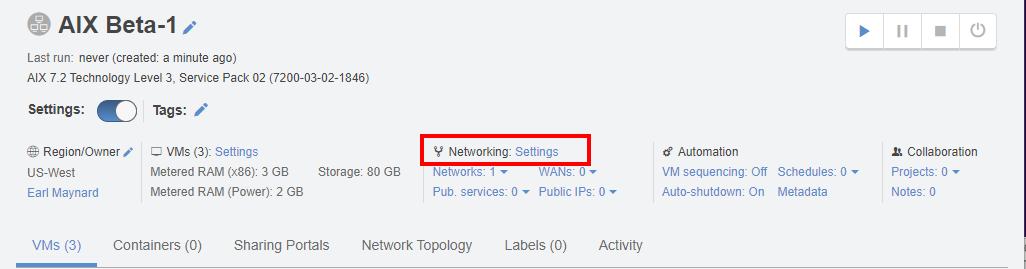
The Network Settings page displays.

-
Note the following:
- Gateway IP address
- Domain name
- Subnet (and Subnet size)
Step 2 – Configuring network settings for an AIX VM
- Click the VM tile in the Environment Details page to connect to the AIX VM using the SRA client.
- Sign in to the OS.
- Edit
/etc/rc.tcpipto comment out the linestart /usr/sbin/dhcpcd "$src_running"to disable DHCP of the LPAR. - In the SRA client view, type
smit tcpip, and then press Enter to launch the TCP/IP page of the AIX System Management Interface Tool (SMIT). - Select Minimum Configuration & Startup, and then press Enter. The Available Network Interfaces dialog displays.
- Select en0 Standard Ethernet Network Interface, and then press Enter.
-
Enter values appropriate for the automatic network.
To clear the existing data in the fields, use the arrow keys and Ctrl+H (instead of Backspace).
For example, these are typical values for an environment automatic network:
TOP Entry Fields Notes HOSTNAME host-1 From hostname in Step 1, above. Internet ADDRESS 10.0.0.1 From IP address in Step 1, above. Network MASK 255.255.255.0 From Subnet size in Step 1, above. Internet ADDRESS 10.0.0.254 From Gateway IP address in Step 1, above. DOMAIN Name test.net From Domain name in Step 1, above. Default Gateway 10.0.0.254 From Gateway IP address in Step 1, above. - Press Enter to set these values, and then press F10 to exit SMIT.
- Repeat these steps for each AIX VM in the environment, using the unique values for each AIX VM that you determined in Step 1, above.
The IP address assigned by automatic networking won’t change, unless you edit the IP address on the Kyndryl Cloud Uplift network adapter, change the network subnet, or detach the Power A CPU architecture that supports IBM i, AIX, and Linux (on Power) in Kyndryl Cloud Uplift. VM from the network (and reattach it in a different order). If the IP address changes, you must repeat this process.
If the DHCP process for the LPAR is active, stop it:
- Find the process ID for the DHCP service.
ps -e | grep dhcpcd
- Kill the DHCP process.
kill -9 {process ID}