Adding and sharing files with the Assets page
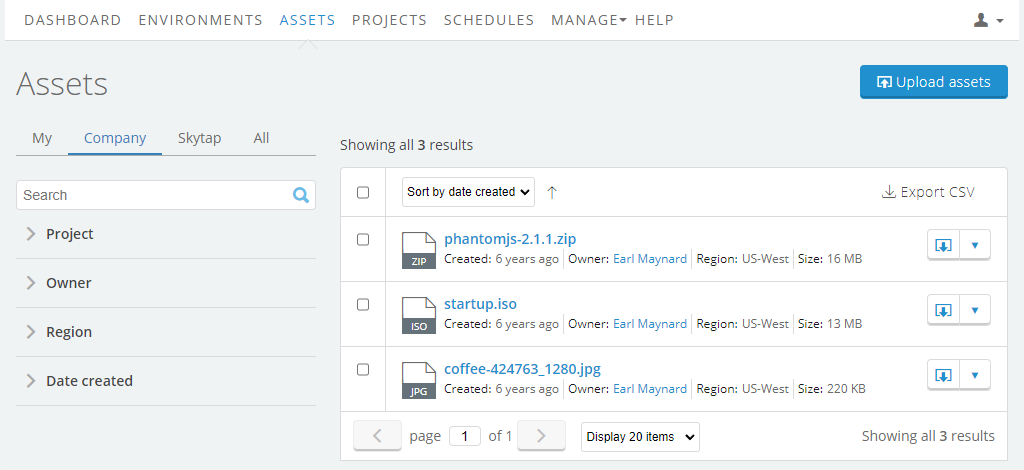
The Assets page is a web-based file repository that you can access from your computer and your Kyndryl Cloud Uplift VMs. It functions like a cloud storage drive. You can upload and download files from the Assets page, share files with other users through projects, and host ISOs for use in VMs.
Contents
To watch a video about assets and learn about other file uploading options, see Transferring files to a VM.
Adding files to the Assets page
To add a file to the Assets page
-
From the Assets page, click
 .
.The Upload Assets page opens in a new browser tab.

- Use the Upload to menu to select what regions you want to upload your file to. If you select multiple regions, Kyndryl Cloud Uplift automatically creates separate upload jobs for each region.
-
Drag and drop your files into the Upload Assets page, or click
 to select your files from a directory.
Asset upload restrictions
- You can upload up to 50 files at one time.
- You can't upload folders. Select each file within a folder that you want to upload.
If you attempt to upload a folder, you will receive the following error message: "One or more of the files you attempted to upload did not succeed. Learn more about uploading valid assets."
- You can't upload files if you don't have enough storage space for them. You can check your storage limit from your Kyndryl Cloud Uplift Dashboard.
-
Click Upload files.
Your files upload in the order they are listed. After your files are uploaded, they appear in your assets list.
Notes
- The Asset upload tool saves upload states between sessions, so if you pause your upload (or if your upload gets interrupted), you can resume it without any loss of progress.
- If you navigate away from the Upload Assets page, the file upload in progress is interrupted and the upload queue is cleared. If you later upload the same file, Kyndryl Cloud Uplift can resume the upload from the point at which it was interrupted.
- To force your files to upload concurrently rather than sequentially, you can click Force Start under each file that you want to begin uploading. Note that the upload speed is affected by the number of files you're simultaneously uploading.
Deleting files from the Assets page
To delete a file from the Assets page
- From the Assets page, click
 to choose files to mark for deletion.
 -
Select the checkbox next to the files you want to delete.
If a file is marked with
 , you don’t have permission to delete it.
 -
Click
 .
.Deleting an asset from your account is permanent. You can’t recover a deleted asset.
Downloading files to a VM or local computer from the Assets page
The download process copies the asset file from the Assets page to a VM or to your local computer.
To download a file
-
Sign into your Kyndryl Cloud Uplift account from the machine where you want to download the file.
- If you want to download the file to your local computer, access Kyndryl Cloud Uplift from your local computer.
- If you want the file to reside on a VM, access Kyndryl Cloud Uplift from the VM.
-
Click the Assets link.
- Use the search and filter options to locate the asset you want to download.
- Click
 Download next to the asset.
 - Following the usual Save As dialog box conventions, place the file in a location of your choice.
Loading an ISO onto a VM
An ISO file saved on the Assets page can be directly loaded into a VM using the VM CD/DVD drive. For instructions, see Using ISO files.
ISO loading is not supported for Power VMs. For LPAR imports, see Importing Power LPARs into Kyndryl Cloud Uplift.
Sharing assets with other Kyndryl Cloud Uplift users
Be default, your assets are only available to you. To share them with other Kyndryl Cloud Uplift users, add the assets to one or more projects.
For more information about how to create and use projects, see Sharing resources with projects
To add an asset to a project
- Upload the file to the Assets page (see Uploading files to the Assets page above).
-
From the drop-down menu next to the file name, select Add to project(s).
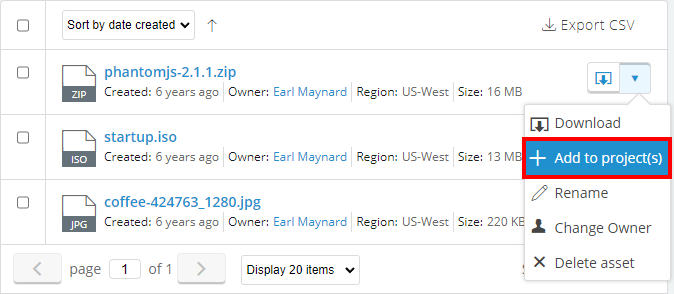
- Select one or more projects to share the file with and then click the Save button.