Importing Power and x86 VMs using IBM Cloud Object Storage
This guide describes how to import x86 The most common CPU architecture. x86 CPUs support Windows and Linux VMs in Kyndryl Cloud Uplift. and Power A CPU architecture that supports IBM i, AIX, and Linux (on Power) in Kyndryl Cloud Uplift. VMs from IBM Cloud Object Storage using the import tool built into your Kyndryl Cloud Uplift account at https://cloud.skytap.com/imports.
Contents
Process overview
To import VMs into Kyndryl Cloud Uplift
- Export your LPARs to OVA files for import into Kyndryl Cloud Uplift.
- Upload or use the IBM Cloud Mass Data Migration service to move the OVA files to your IBM Cloud Object Storage bucket.
- Use the VM Imports tab in Kyndryl Cloud Uplift to create an import job.
- Start the import process. Kyndryl Cloud Uplift processes the VMs and creates virtual environments in your Kyndryl Cloud Uplift account.
Your customer account can have a maximum, combined total of five import and export jobs running simultaneously.
Step 1: Prepare the VMs for import
Before you begin, read Preparing Power LPARs for import into Kyndryl Cloud Uplift to create OVF or OVA files from your LPARs for import into Kyndryl Cloud Uplift.
Step 2: Stage the OVA files to your IBM Cloud Object Storage storage bucket
Either upload or use the IBM Cloud Mass Data Migration service to move the OVA files to your IBM Cloud Object Storage bucket.
- If you haven’t used IBM Cloud Object Storage before, review Getting started with IBM Cloud Object Storage.
- To directly upload OVA files into your IBM Cloud Object Storage bucket, see Upload data.
- To use the use the IBM Cloud Mass Data Migration service to move large or multiple OVA files into IBM Cloud Object Storage, see IBM Cloud Mass Data Migration.
Step 3: Create Import job
Create an import job for each OVA file that you want to import.
To create an import job
- From the Navigation bar in Kyndryl Cloud Uplift, click Environments.
-
Click the VM Imports tab.
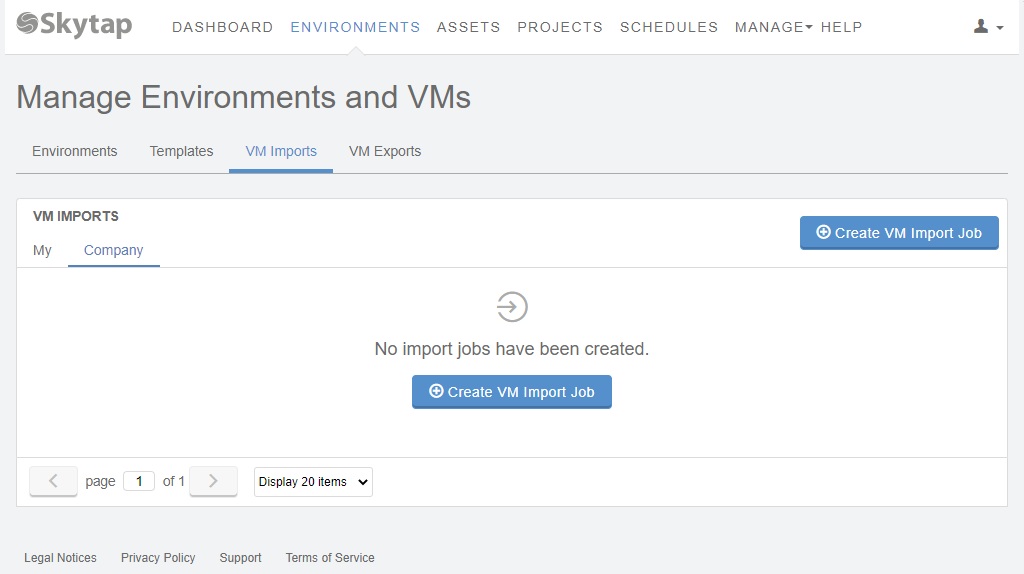
The VM Imports tab notifies you if you don’t have permission to import VMs. If needed, work with your account administrator to gain access.
- Click
 (Create VM Import Job).
 -
Provide details about the import, including:
- The Environment name (maximum 255 characters).
- The Data source for the VMs. Choose IBM Cloud Object Storage.
- The Destination region where the environment will be added.
- The IBM region that contains your IBM Cloud Object Storage bucket.
- The Bucket instance CRN The Cloud Resource Name (CRN) uniquely identifies a resource (in this case the bucket instance) in the IBM Cloud. .
-
An authentication method (choose either HMAC Hash-based Message Authentication Code – A short series of characters used for secure authentication. or API key) and provide credentials for IBM authentication options:
HMAC
- Access key
- Secret access key
or
API key
-
API key
For details about where to find IBM Cloud Object Storage bucket details, see How do I find the details for my IBM Cloud Object Storage bucket?.
-
Optional: An MD5 Hash Value. For more information, see Creating MD5 hash values for VM imports.
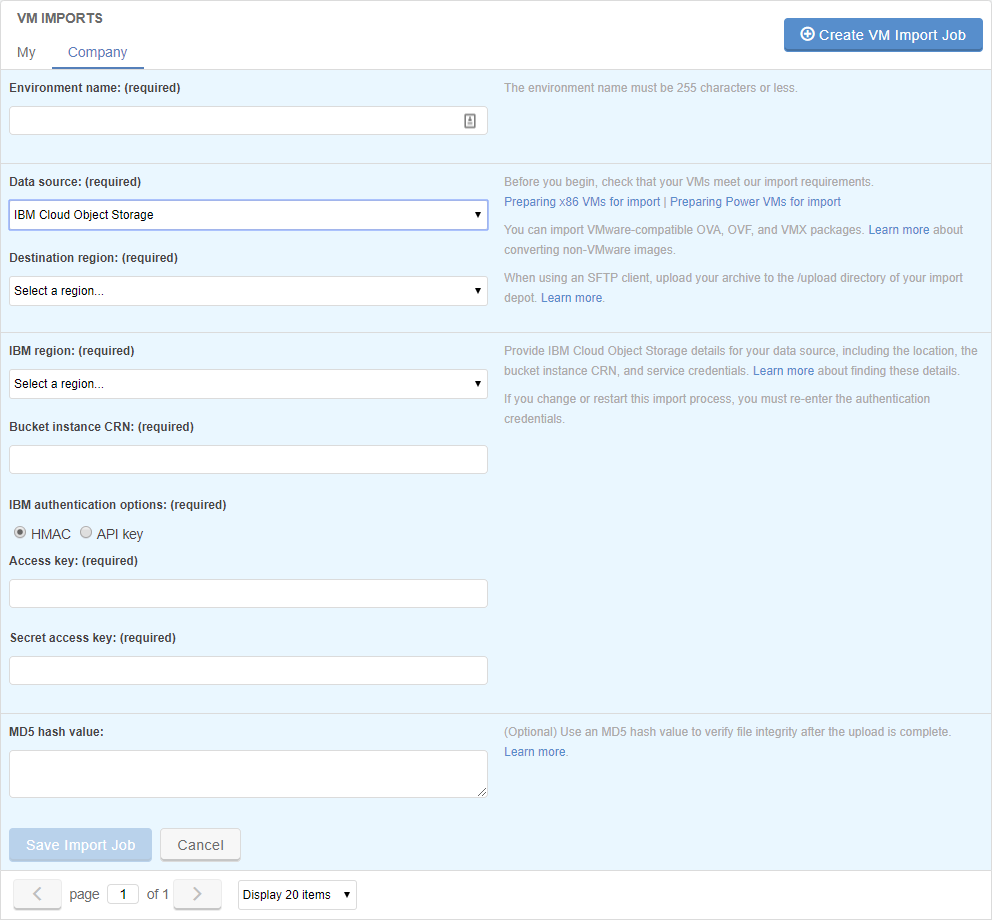
- Click Save Import Job.
Step 4: Start the import process
Click Create environment on the Kyndryl Cloud Uplift Import page. Kyndryl Cloud Uplift imports the VM file and create your new environment.
Kyndryl Cloud Uplift notifies you via email when the import completes. If the import is successful, Kyndryl Cloud Uplift provides a link to the new environment; if the import fails, Kyndryl Cloud Uplift provides an error message (see Resolving import errors).
Additional information about the import process

Kyndryl Cloud Uplift creates a new environment from your VMs in three stages:
- Analyzing – Kyndryl Cloud Uplift checks the SFTP upload folder for VM files, confirms the file type, and compares MD5 hash values (if applicable).
- Importing – Kyndryl Cloud Uplift imports the VMs.
- Finalizing – Kyndryl Cloud Uplift creates the virtual environment and any associated virtual networking. Whenever possible, Kyndryl Cloud Uplift retains the original networking information for VMs. If the original networking can’t be found or retained, Kyndryl Cloud Uplift creates one or more automatic networks for the new environment.
Optional steps once the import is complete
- Install VMware Tools on all imported x86 VMs – VMware Tools provides many drivers specific to running an x86 VM operating system in a virtual environment. For instructions, see Installing and upgrading VMware Tools on Windows VMs.
- Test the VMs – Use the instructions in Testing imported VMs.
Notes
- Imports can take between 30 minutes to several hours to complete.
- If you're importing VMs on hardware version 6, 7, 8, or 9 into any region other than US-West, Kyndryl Cloud Uplift automatically upgrades the VM to hardware version 11 during the import process. For more information about hardware versions, see Checking VM hardware version .